This post may contain affiliate links(s). An affiliate link means I may earn advertising/referral fees if you make a purchase through my link,
without any additional cost to you. It helps to keep this site afloat. Thank you in advance for your support. If you like what we do here, maybe buy me a
coffee.
Canon EOS-M Tips and Tricks while on the road
I originally thought about talking about the EOS-M system after Craig from CanonRumors started his top 5 camera list. I was going to follow along and produce my own top 5, in which at least one camera on that list would have been the original EOS-M camera.
The EOS-M original camera was much maligned for being slow to focus, no EVF, and generally just a small mirrorless camera with just a few lenses for it. However, it's touch screen was great, the build quality was fantastic, and really, it opened the door to mirrorless cameras for me, and I haven't looked back since.
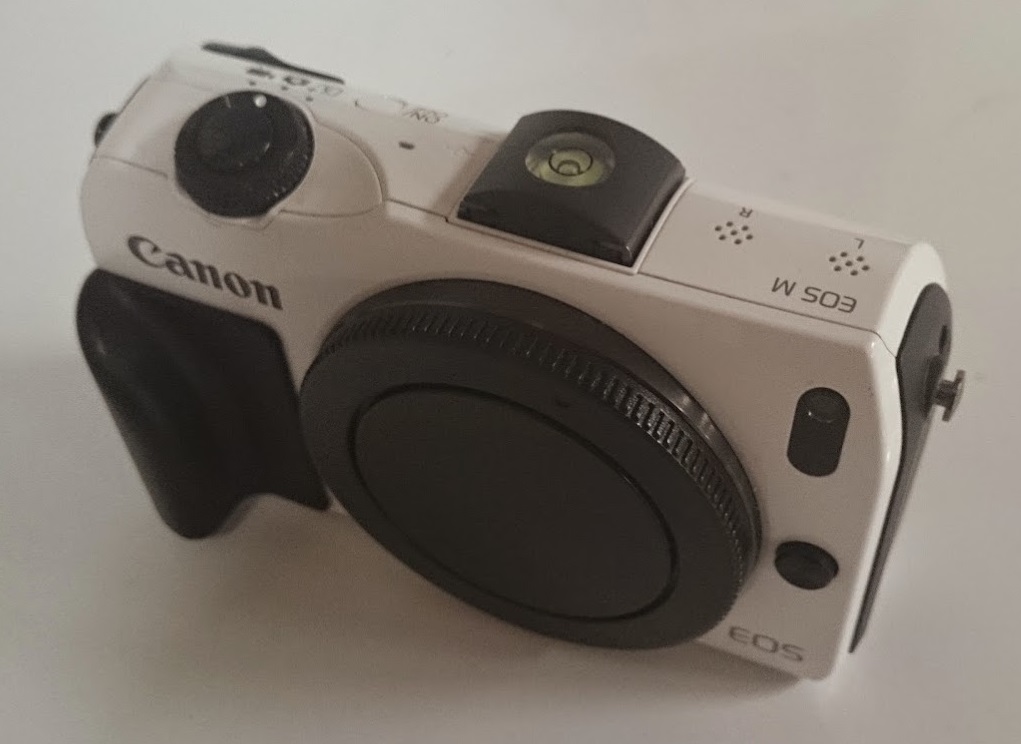
I actually started off using the system as soon as Canon released the 11-22mm EF-M lens for it in 2013. I've traveled with it extensively since then, literally dumping my heavier 5D Mark II and 7D Mark II cameras. I have used almost every single EOS-M camera that was released since 2012. That EF-M 11-22mm lens has been around the world with me since then and is still going strong 7 years later. However, I do have to admit, it looks like it’s been around the world with me.
There's an old saying that the more worn the lens, the better it actually is.
This article is really about those that are getting into the EOS-M system, and the top tips and tricks that I’ve used over the years to get the most out of the system. Most of these suggestions are common for those that have been around the EOS-M or other system cameras, but I do hope they help out those that are starting down the path that I took in what seems like so many years ago.
Filters
For some reason, Canon seems to have this perverse joy in coming out with new filter diameters to use on the EF-M system, everything from 43mm to 55mm has been used on various EOS-M lenses.
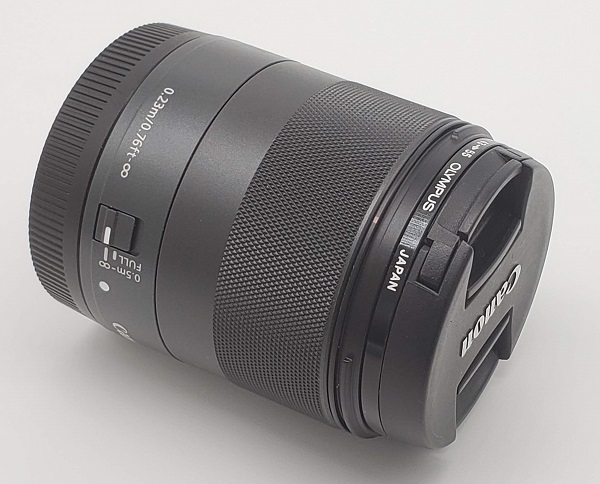
The first thing I would suggest to anyone using the system is to rid themselves of all the various lens caps, and focus on 55mm with step-up rings. If you are a user of lens hoods, 55mm filters still work with all the EOS-M hoods, as all the lens bodies are the same diameter at 60mm. This allows you to use one set of filters for all your lenses without a problem. This is actually a nice feature of the EOS-M system. The exceptions to this, are slim, with the 22mm, 28mm primes not accepting Canon lens hoods. However, there is a vast aftermarket supply of 35mm lens hoods that are suitable. There have been reports of the EF-M 32mm F1.4 being fussy with step-up rings, but I have used both cheap Chinese step up and some brand name step-up rings without a problem.
Also, this allows easy swapping between lenses as all the lenses use the same sized lens cap as well. Granted you have to purchase new lens caps, but if you do this in advance, you can actually purchase them in bulk.
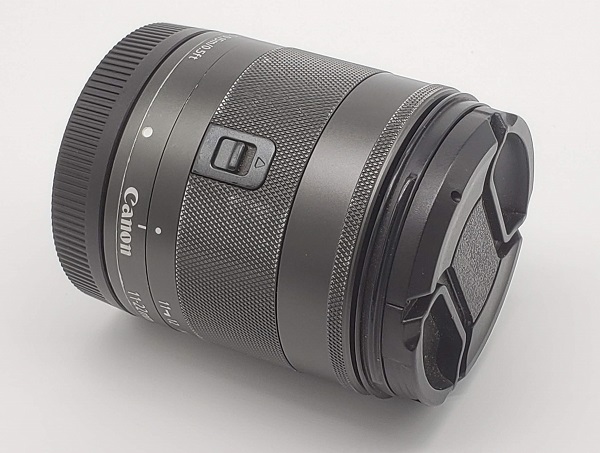
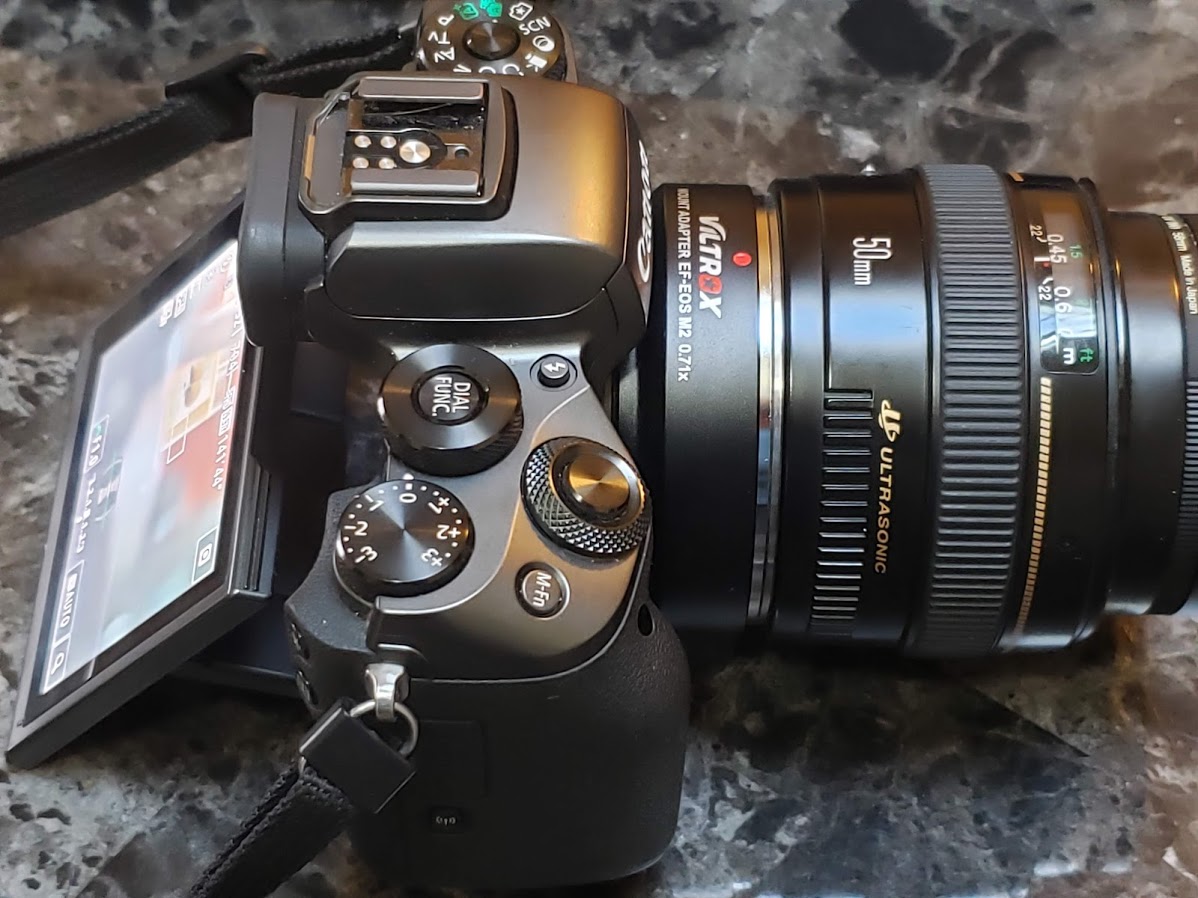
The above image is my EF-M 32mm F1.4 with a 43 to 55mm step-up ring and a 55mm lens cap. As you can see the lens cap fits onto the camera well, without it being larger in diameter than the lens.
Straps
While this is more a common camera tip, usually people that purchase into the EOS-M system are new users to ILC’s (interchangeable lens cameras). Moving away from the supplied neck strap is good for several reasons;
- it allows you to be more inconspicuous as the new strap isn’t black and red with the word Canon emblazoned over it
- it allows you to tailor the strap to how you use the camera. Some people like myself like to use a neck strap, others like a hand strap because the camera is so small. You don’t have to go expensive for a good neck strap, since the camera and lenses do not weigh a lot. I would suggest not to get a neoprene neck strap because I personally find it makes the camera bounce too much against my body, and with sensitive controls for viewfinder and also LCD, that can lead to more times the camera wakes up from being asleep.
I personally use a neck strap that is 1” in width. This way, when I want to, I can wrap the strap around my wrist, and use it as a wrist strap, or leave it so that it is around my neck as well.
One special note is to make sure the strap you purchase will fit the lugs of the camera. Canon has changed the strap lugs as time went on, for instance, if you have an original EOS-M you have to purchase a strap that uses Hasselblad connectors.
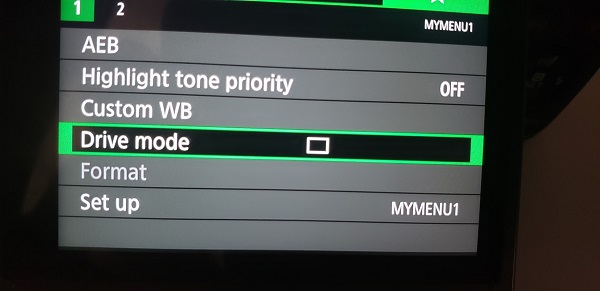
Setup My Menu
All modern Canon cameras have what is called My Menu. You can register most commands to be included in your My Menu. I suggest having your most-used menu items on this menu. For me, I have AEB, Custom WB, Format on all my cameras, and the rest I customize a bit more depending on the camera’s usage. Some of these items are selectable on your quick menu, by hitting Q but I find it easier for me personally to find it on My Menu than scrolling through the Quick menu icons on the screen.
Make use of your LCD
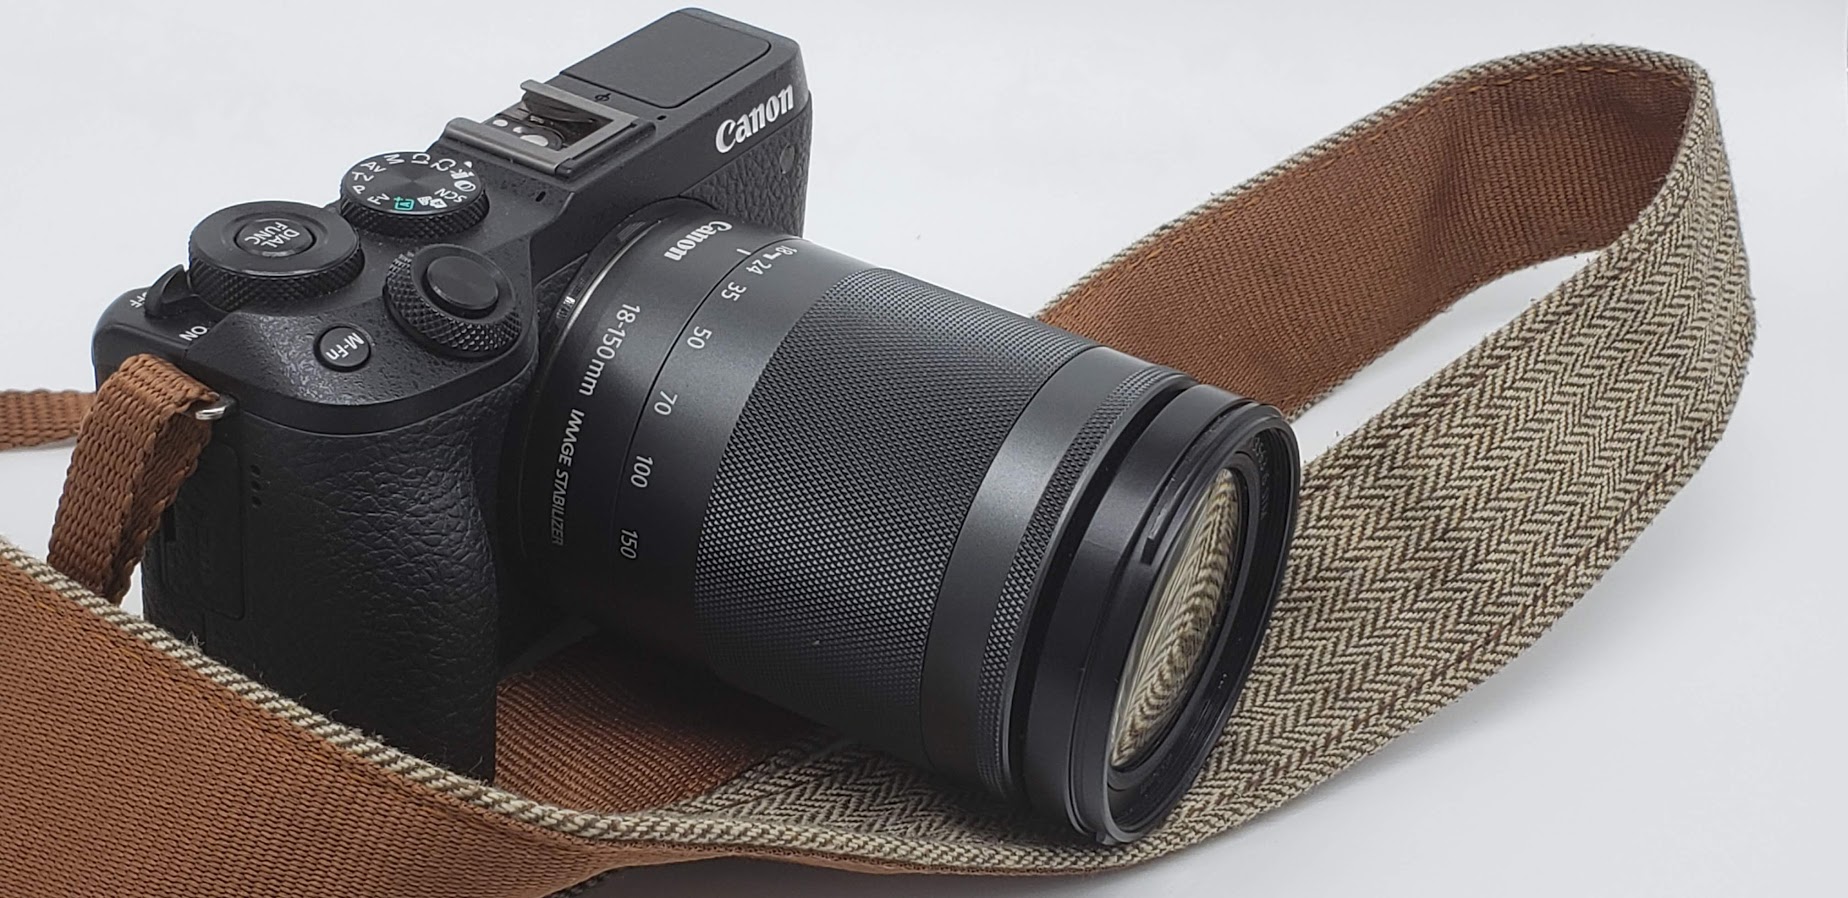
Most of Canon’s EOS-M cameras now have an articulating or tilting screen. These screens are very useful to change the angle and height in which you are shooting. The habit, of course, is always to shoot from a standing position, with the camera up to your face (or slightly in front of you if you don’t have an EVF viewfinder) but don’t be afraid to change how you shoot with it. One of the advantages of an ILC over a smartphone is that you can easily change the angle in which you are shooting the picture from, and still see it from a comfortable height.
For example, the traditional “medium format” position would be to have the camera at your waist, with your screen tilted or swiveled up so you can look down and see what you are shooting. That gives you a different perspective than shooting at eye level. Play with it, and don’t be afraid to try different heights while you are shooting. There is a reason why the cameras have tilting or articling screens.
The EOS-M is Adapter Heaven
All of the mirrorless cameras because they all have a much shorter distance between the sensor to the lens mount, can adapt a wide variety of lenses. You can adapt old Canon FD, Olympus OM-1/2, Pentax M42, and the list goes on and on. Some people find it a secondary hobby to collect old lenses and see how well they perform, and the various looks they give when used with a modern camera. Most of the EOS-M cameras now have what is called Focus Peaking. Focus peaking will outline areas that are in focus with a blue, red or yellow outline. This aid helps you to see what will be in focus. This is especially handy with old manual focus lenses that you can adapt to the EOS-M. Because you are using a smaller sensor (APS-C sized) you usually get to use the better part of the old lenses, as usually with lenses their optical quality falls off the closer to the edge of the frame that you get. The APS-C sensor “crops” out more of the bad part of the frame.
Viltrox and Metabones also make what is called a focal reducer or “speed booster”. What this does is take your older lenses that were made for full frame, and reduces the focal length of that lens to take into account the crop factor. For example, a 35mm full frame lens on an EOS-M camera has the same field of view as a 56mm lens on a full frame camera. This is because the EOS-M cameras use what is called an APS-C sized sensor, which is smaller than a full frame sensor. By using a focal reducer, that 35mm lens instead of having a 56mm field of view, will now have approximately a 35mm field of view. It also decreases the aperture as well, thus the name, speed booster. There is a penalty because there is some additional optics in between the lens and the camera but it’s certainly another way of experimenting with your mirrorless EOS-M.
You can also purchase tilt shift adapters for you EOS-M. These adapters allow normal older lenses to be used with a tilt shift mechanism. Tilt shift lenses are usually incredibly expensive, but with a moderately inexpensive adapter, you can make any lens work as a tilt shift lens for your EOS-M.
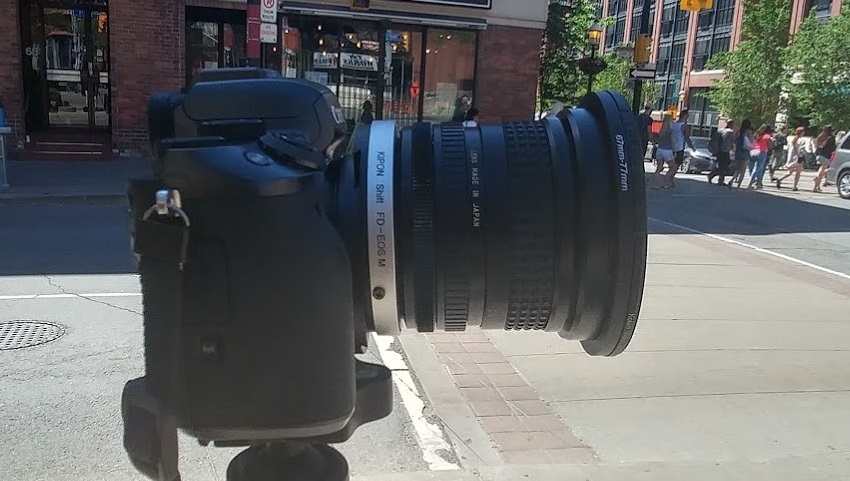
For example, this is a 17mm F3.5 lens attached to a shift adapter. The cost of this is far less than a Canon shift lens would cost to give the same field of view (approximately the TS-E 24mm).
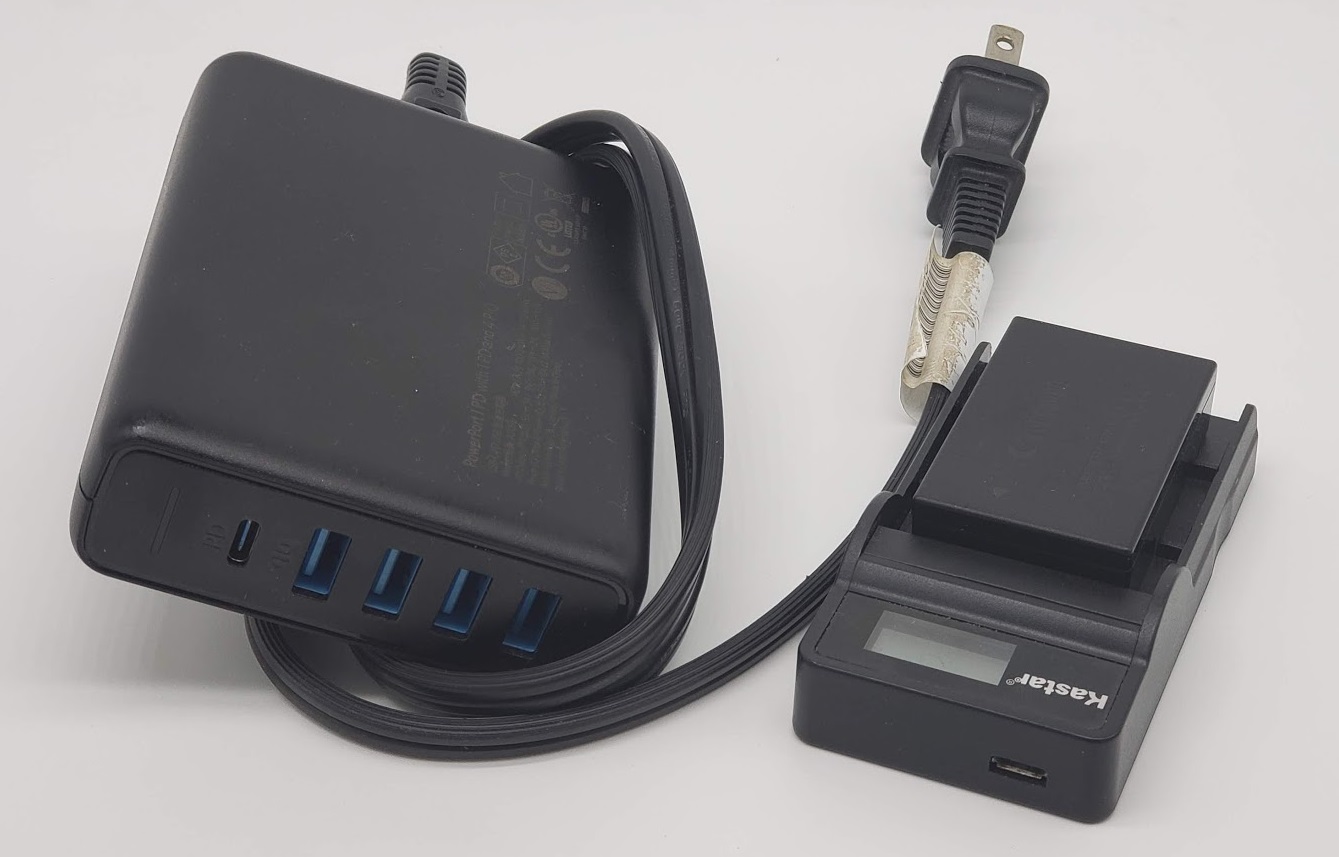
Replace the LP-E17 (or LP-E12) battery charger
Now, this tip comes with a caveat. Using a different non-standard charger with your Canon batteries is not guaranteed by Canon to work. The chargers are usually not up to Canon’s exacting standards. However, I, personally and others have not had any problems with third-party chargers, however, the risk is there, so follow this advice at your own risk.
What I personally use for all my cameras is USB based chargers like the one shown below. These chargers simply take a standard USB charger and work quite well. The benefit to these is traveling. You can travel with a RAV Power multiple USB charger that works in nearly every country on the planet, and no matter what, have the ability to charge your camera batteries without worrying about AC plug adapters, etc for all your camera chargers. This provides the ultimate in charging flexibility. When I have used AC based chargers like the one that Canon provides, more than once, I have forgotten the charger at the hotel room when I left, because it’s not really with everything else, you have to find a plug in the wall. Using a RAVPower charger, and USB based LP-E17/E12 charger simply sits on the nightstand so I can charge my phone, tablet and camera batteries all from one convenient charger.
Don't forget about Infrared
In the next month or so we'll start to dive into why the EOS-M system is good for infrared, however, take our word for it, that most of the EF-M lenses are good to excellent for infrared converted cameras. This is a rarity with mirrorless cameras. The problem with mirrorless cameras and infrared conversion is that most of the lenses exhibit what is called "hotspots" or an area in the center of the lens which is much lighter, and less contrast than the rest of the image. It's usually a very white circle in the center of the image, thus called "hotspot". This doesn't happen on most of the EOS-M lenses, or if it does, it happens at apertures people don't usually use. This makes the system I would say very uniquely suited to infrared modification. If you are using the EOS-M system, you can get another EOS-M camera used, and have a company, such as KolariVision perform the modification for you. If you do, the only camera I strongly suggest you do not get modified is the EOS-M3 - it's the only blemish, where this camera simply does not convert to infrared well.
What I personally have done is converted my main camera to something called "full-spectrum" which allows me to shoot normal color, infrared and any specialty modified filter such as IR Chrome (shown below).
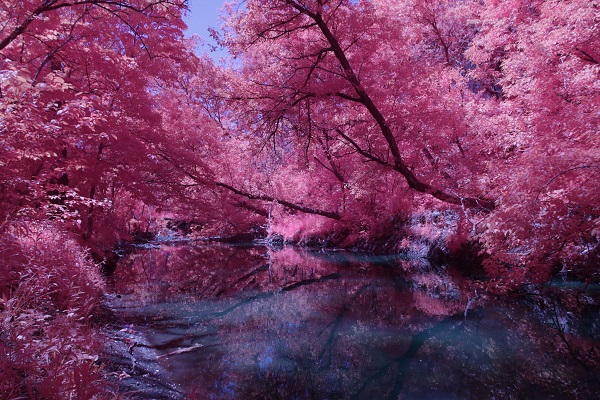
This way, my one camera can be used in a variety of ways. With the EOS-M system using 55mm filters as we talked about before, I then only need one set of filters for all my lenses.
What do I travel with?
For the absolute weight limited travel, I go with a Canon EF-M 11-22, Canon EF-M 18-150mm and sometimes a Canon EF-M 22mm F2.0 and a set of filters with my full spectrum EOS-M5 camera. I can shoot from the equivalent of 18mm to 240mm in a small compact camera system and in significantly varied lighting and style from IR Chrome to normal color photography.
For a more complete system and when I may be doing portraits and other shooting styles, the kit is a little more expansive. For instance, now, I'm traveling with;
My cameras are a full spectrum EOS-M5 and a normal color EOS-M6 Mark II. I will most likely convert the M6 Mark II to full-spectrum and retire the EOS-M5.
Final Thoughts..
There will come a time when my main travel camera will gravitate to the RF system instead of the EOS-M, but for 7 or more long years, the EOS-M system has traveled with me and has been a lightweight and small camera system that can handle almost any situation. These days, carry on luggage is coming under more and more scrutiny with respect to size and weight. An EOS-M system can easily fit into your carry on luggage, with laptop and various necessary travel items and still be under the most draconian of airline requirements. I hope these tips helped you along you way. The EOS-M system is a small compact and easy to travel with system.

Richard CanonNews
Richard has been using Canon cameras since the 1990s, with his first being the now legendary EOS-3. Since then, Richard has continued to use Canon cameras and now focuses mostly on infrared photography. Richard is the founder and editor of CanonNews since 2017, and has worked as a writer on CanonRumors and other websites in the past.
Other posts by Richard CanonNews